My first time making these oven-baked cheesy tacos, I wanted something faster than taco night but with the same comforting crunch and melty cheese. This recipe delivers a crisp shell, saucy seasoned beef, and bubbling cheese in under 30 minutes. It’s perfect for busy weeknights, casual get-togethers, or a crowd-pleasing potluck. If you enjoy cheesy, handheld dinners, you might also like the flavor-packed variations in cheesy chicken garlic wraps for another easy, family-friendly option.
Why you’ll love this dish
Oven-baked cheesy tacos give you all the joy of a crunchy taco without standing over the stove to melt cheese by hand. They’re fast, budget-friendly, and easy to scale up. The method keeps shells crispy because brief oven baking melts the cheese quickly without sogging them. Kids love the simplicity, adults appreciate the time saved, and hosts appreciate being able to prep the filling ahead.
"Simple, quick, and everyone at the table asked for seconds. The cheese bakes into the beef so every bite is saucy and crunchy."
This recipe shines as a weeknight dinner but also works for casual weekend gatherings. Use it when you want something better than takeout with minimal fuss and reliable results.
Preparing Oven-Baked Cheesy Tacos
Quick overview so you know what to expect. Brown the beef with onions, season and simmer with tomato sauce or salsa, fill hard shells, top with shredded cheese, then bake just until the cheese melts and shells turn golden. Finish with fresh toppings like lettuce, tomatoes, and cilantro. Total hands-on time is short and cleanup is minimal.
What you’ll need
- 1 lb (450 g) ground beef
- 1 small onion, finely diced
- 2 cloves garlic, minced
- 1 packet taco seasoning (or 2 tablespoons homemade mix)
- 2/3 cup tomato sauce or salsa (use your favorite heat level)
- Salt and pepper to taste
- 8 hard taco shells
- 2 cups shredded cheese (cheddar, Monterey Jack, or Mexican blend)
- 1 cup shredded lettuce
- 1/2 cup diced tomatoes
- 1/4 cup diced red onion
- 2 tablespoons chopped cilantro (optional)
- Sour cream (optional)
- Guacamole (optional)
- Jalapeño slices (optional)
- Hot sauce (optional)
Notes and substitutions: swap ground beef for ground turkey or a plant-based crumbles if you prefer a lighter or vegetarian option. If you like softer tacos, use warmed corn or flour tortillas instead of hard shells. Low-sodium taco seasoning is a good choice if you watch salt intake.
Directions to follow
- Preheat your oven to 400°F (200°C). Arrange the hard taco shells upright in a baking dish so they stay stable.
- Heat a skillet over medium. Add the ground beef and diced onion. Cook, breaking the meat up, until the beef is fully browned and the onion is soft. Season with a pinch of salt and pepper while cooking.
- Carefully drain any excess fat from the pan. Return the skillet to medium heat. Stir in the minced garlic and taco seasoning. Cook for about 1 minute until fragrant.
- Pour in the tomato sauce or salsa and stir. Let the mixture simmer gently for 4 to 5 minutes so flavors meld and the sauce thickens slightly. Taste and adjust seasoning.
- Spoon the beef mixture evenly into each prepared taco shell. Sprinkle the shredded cheese over the top, covering the filling.
- Bake in the preheated oven for 10 to 15 minutes. Watch for bubbling cheese and lightly golden shells. Baking just long enough prevents sogginess and keeps the shells crisp.
- Remove from the oven and top the tacos with shredded lettuce, diced tomatoes, red onion, and chopped cilantro as desired. Add sour cream, guacamole, jalapeño slices, or hot sauce on the side.
- Serve warm and enjoy with your favorite sides.

Best ways to enjoy it
These tacos plate beautifully on a large platter for sharing. Serve with cilantro-lime rice, a simple black bean salad, or crunchy tortilla chips. For beverages, iced tea or a citrusy soda pairs well with the savory spices. If you want a portable option, wrap a warm taco in parchment for easy eating.
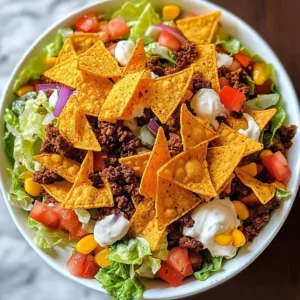
For a different approach, try folding the baked tacos into a shallow bowl of lettuce for a taco salad vibe. If you want another baked, cheesy handheld with similar appeal, the recipe for cheesy garlic chicken wraps offers a great alternate filling and flavor profile.
Storage and reheating tips
Store leftovers in an airtight container in the refrigerator for up to 3 days. To keep the shells as crisp as possible, remove any fresh toppings like lettuce and tomatoes before storing. Reheat in a preheated oven at 350°F (175°C) for about 8 to 10 minutes, or until heated through. A toaster oven works well for single servings. If you must microwave, do so briefly and expect the shell to soften.
Freezing tips: freeze only the cooked beef filling in a sealed container for up to 3 months. Thaw overnight in the refrigerator and reheat on the stovetop, then assemble in fresh shells and bake. Do not freeze assembled baked tacos if you want to retain crunch.
Food safety reminder: cool hot food to room temperature within two hours, then refrigerate. Reheat leftovers to an internal temperature of 165°F (74°C) before serving.
Helpful cooking tips
- Brown the beef well. A good sear adds flavor through caramelization.
- Drain fat but leave a teaspoon in the pan to carry flavor when you add garlic and seasoning.
- If taco shells tip over, nestle them between rolled-up foil or use a taco rack to keep them upright.
- Use a blend of cheddar and Monterey Jack for great melt and flavor.
- For extra crisp shells, give them a quick 3-minute toast in the oven before filling.
- Taste the meat mixture before stuffing and adjust salt, acid, or heat if needed. A squeeze of lime brightens the whole dish.
Flavor swaps
- Vegetarian: replace beef with a mix of sautéed mushrooms and black beans, seasoned the same way.
- Chicken: use shredded rotisserie chicken tossed with salsa and a little enchilada sauce before filling.
- Spicy: stir in chopped pickled jalapeños or a teaspoon of chipotle in adobo for smoky heat.
- Tex-Mex: add corn, black beans, and a sprinkle of smoked paprika to the filling.
- Cheesy crisp: sprinkle a little extra cheese around the edges of the shells before baking to create crispy cheese lace.
Common questions
How long does this recipe take from start to finish?
Plan for about 25 to 30 minutes total. Browning the beef takes roughly 8 to 10 minutes, simmering the sauce 4 to 5 minutes, and baking 10 to 15 minutes.
Can I prep the filling ahead of time?
Yes. Make the beef filling up to 2 days ahead and refrigerate. Reheat gently on the stovetop, then fill and bake the shells just before serving.
Will assembled baked tacos stay crispy if refrigerated?
Assembled tacos tend to soften in the fridge. For the best texture, store the cooked beef filling separately and assemble just before baking and serving.
What cheese melts best for these tacos?
A mix of cheddar and Monterey Jack or a Mexican blend gives the best melt and flavor balance. Cheddar adds sharpness while Monterey Jack brings creamy melt.
Can I use soft tortillas instead of hard shells?
Yes. Warm soft corn or flour tortillas briefly, fill with the beef mixture and cheese, then fold and place seam side down in the baking dish. Bake until cheese melts.
Are there good make-ahead tips for feeding a crowd?
Double the beef filling and keep it warm in a low oven or slow cooker. Arrange shells on several baking dishes and bake in batches so everyone gets hot, crisp tacos.

Oven-Baked Cheesy Tacos
Ingredients
Method
- Preheat your oven to 400°F (200°C). Arrange the hard taco shells upright in a baking dish.
- Heat a skillet over medium. Add the ground beef and diced onion. Cook, breaking the meat up, until the beef is fully browned and the onion is soft. Season with a pinch of salt and pepper.
- Carefully drain any excess fat from the pan. Return the skillet to medium heat. Stir in the minced garlic and taco seasoning. Cook for about 1 minute until fragrant.
- Pour in the tomato sauce or salsa and stir. Let the mixture simmer gently for 4 to 5 minutes.
- Spoon the beef mixture into each taco shell and sprinkle shredded cheese on top.
- Bake in the preheated oven for 10 to 15 minutes until the cheese is bubbling and the shells are golden.
- Top with shredded lettuce, diced tomatoes, red onion, and chopped cilantro as desired. Serve with optional toppings.